Another One Bites The Dust

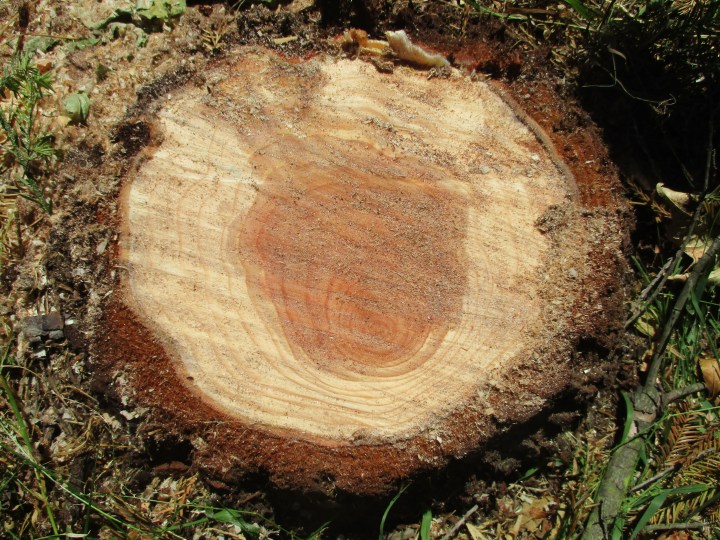
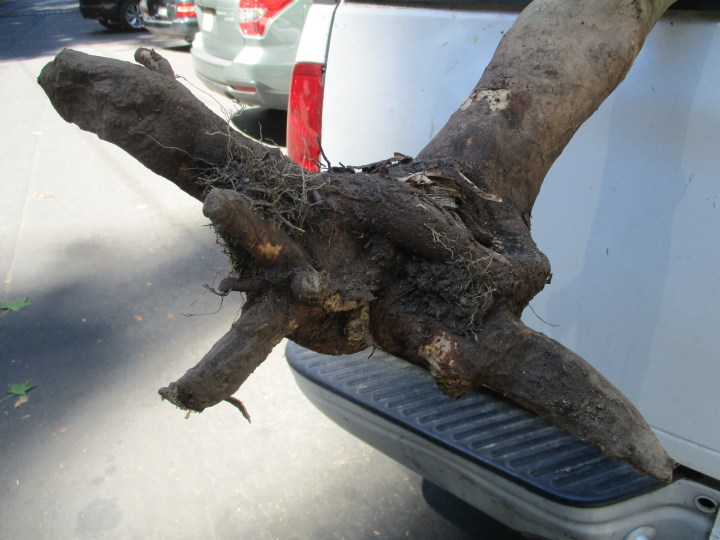
P90825If this looks familiar, it is because it is the second big camellia to be killed here in the same manner in not much more than two months. The damage is not fresh, likely because the gopher that caused it started chewing on the roots as soon as the other camellia was removed. The other camellia succumbed about two months after a similarly damaged cherry tree was removed.

We are now concerned for a remaining third camellia in the same spot, as well as others in the vicinity. There is also concern that the gopher may take interest in something else, such as the birches. We would typically find and destroy any gopher that causes such problems. The difficulty here is that the area is thoroughly covered with a dense layer of Algerian and English ivies.

All evidence of gopher excavation is obscured. Even if we could locate such excavation, it would be very difficult to cut through the thicket of ivy without collapsing the tunnels that we would need to put the traps into. It would be excellent to get rid of the ivy as well as the gopher, but that would be a major project for another time. As voracious as gophers are, they don’t eat ivy!

For now, we can only watch the adjacent camellia and other camellias in the vicinity for distress. Of course, by the time a problem is noticed, it will likely be too late to do much about it. We could only apply blood meal, and hope that it works as a repellent. These camellias get blood meal as fertilizer anyway, so would only need more applied off schedule and around the trunks.

The remains of the deceased camellia were removed from the site, and respectfully interred into the green waste recycle bin.

Fake Six on Saturday

P90824K‘Six on Saturday’ is a weekly tradition for many of us who enjoy sharing six horticulturally oriented pictures on Saturday. I just did it earlier this morning.

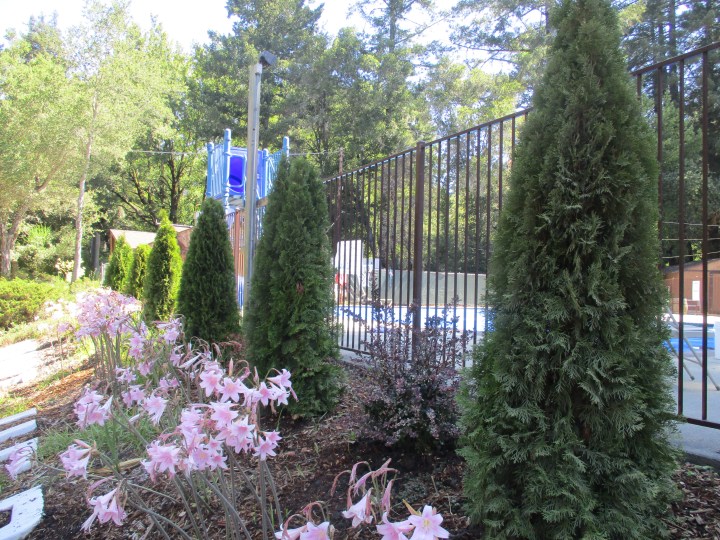
This is not ‘Six on Saturday’. It is just one picture of six arborvitae. What’s worse is that there is an indistinguishable seventh at the far end of the row. It blends into the sixth in this picture. There are seven barberry between them, with the seventh beyond the last arborvitae. This picture was taken more than a week ago, so most of the amaryllis are done blooming now.

This row of arborvitae and barberry was installed early last winter, after a grungy hedge of photinia was removed. It would have been nice to salvage the photinia, but they were such a mess that the process would have taken more than two years, and even then, would have been patchy.

These arborvitaes will not grow into a contiguous hedge like the photinia were, but already soften the otherwise uninviting visual impact of the plain and uniform fence behind. They will grow taller and broader, but will never get so big that they will be difficult to maintain. It should be easy enough to get behind them to prune away parts that get too close to the fence.

I happen to be pleased that we were able to incorporate this sort of formality into an otherwise completely informal landscape. The irregularity of the terrain, as well as the randomness of the big forest trees that were here before landscapes were installed, make such formality nearly impossible. Even if it were easier, formality is not exactly fashionable in landscape design.

Despite their imposed formality and exotic origins, both the arborvitae and the barberry are remarkably compatible with the native flora of the surrounding forest landscape.

Six on Saturday: The Shining


‘Shiners’ have nothing to do with Rudbeckia hirta, which is commonly known as ‘black eyed Susan’. (Why did rude Becky hurt Susan like that anyway?) Shiners are the wounds left from pruning significant limbs from their supporting limbs or main trunks. They shine most blatantly when fresh, and then fade in the weather.

The best shiners are those that will be compartmentalized (healed over) most efficiently. They should not be cut too deeply, or be left with stubs that interfere with compartmentalization. There is quite a bit of science to shiners.

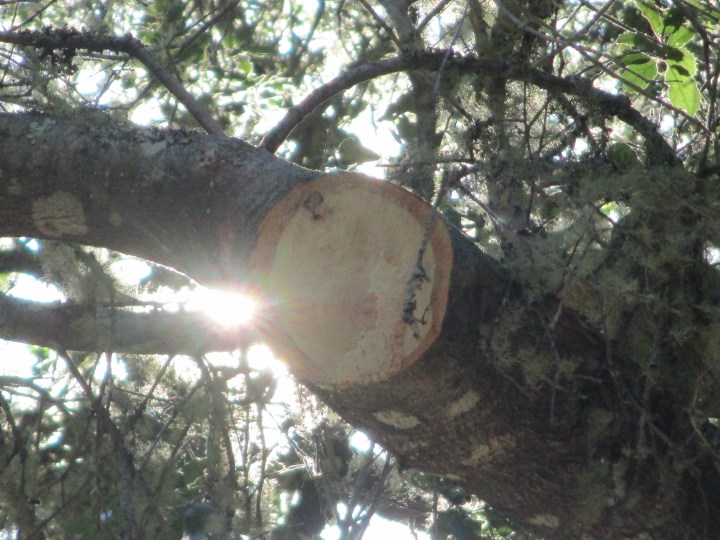
1. This is a good example of a bad shiner. (I could have gotten a better picture of it, but thought that the sun shining from behind was appropriate to the topic.) This shiner was not made by pruning a limb away from a main trunk, but by pruning a main trunk away from a limb. The main trunk leans over so much that most of it needed to be removed to maintain minimal clearance over a driveway. The only two options were to prune it back the the limb on the left, or remove the entire tree. Because the shiner is wider than the remaining limb, which will become the main trunk, it will take several years to be compartmentalized. By that time, decay will have extended downward from the shiner into the main trunk below.P90824
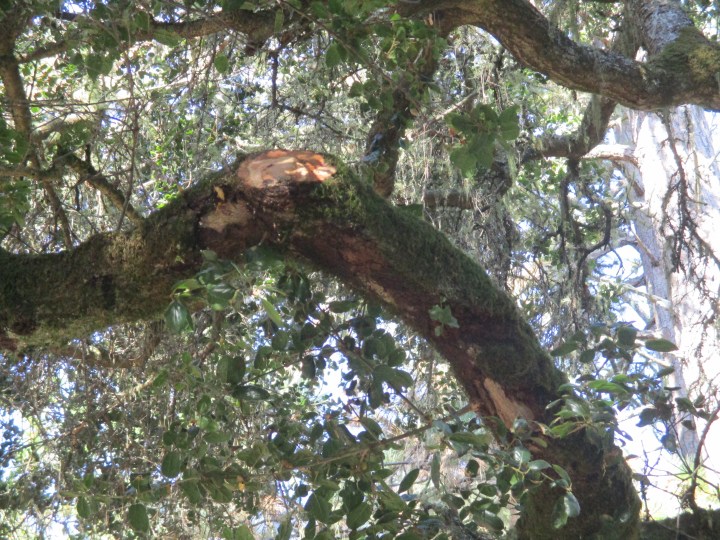
2. Removal of a limb that was battering the topsides of delivery trucks left the shiner above and left of the center of the picture. The scar to the lower left of the shiner, and another scar farther the lower right, closer to the lower right corner of the picture, were caused by a single altercation with one truck that drove off the edge of the driveway. Since it is not really encroaching into the driveway, or interfering with minimal clearance, this particular damaged limb remains.P90824+
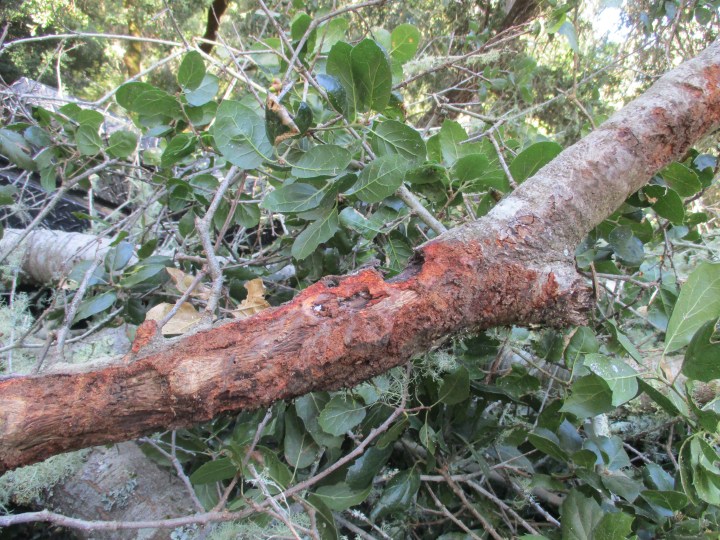
3. This is the thrashed limb that was removed from the limb in the #2 picture above. The freshest damage is still red. This limb had been up above minimal clearance for a few years before the supporting limb sagged with the weight of the growing canopy above. Damage to the trucks is more of a concern than the limbs, so it had to go.P90824++
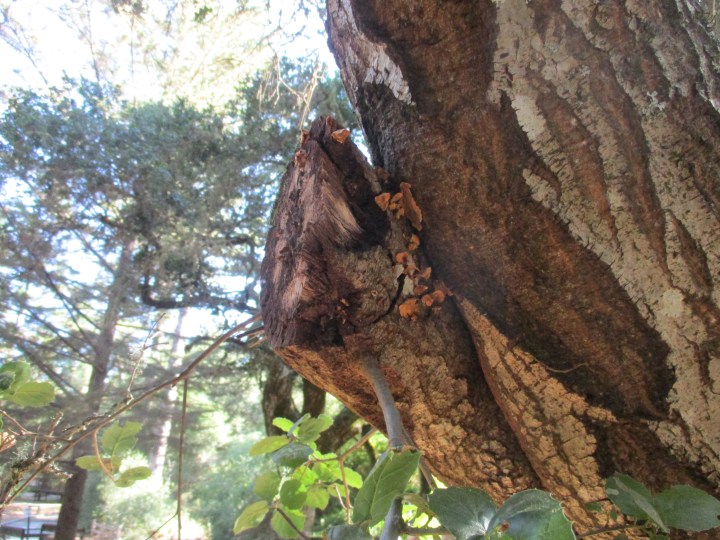
4. This is another good example of a bad shiner. The main trunk to the right would not have been able to compartmentalize over the stub until it grew out past it, or the stub rotted and fell away. The stub was partly rotten, but also partly viable, with a small branch growing from it. The viable portion would have taken more time to rot away. The whole mess was cut away after this picture was taken; but the resulting shiner that I did not get pictures of has another problem. This picture shows how the stub wraps around the main trunk from behind. The bark compressed between the stub and the main trunk, which is known as ‘included bark’ or ‘bark inclusion’, will temporarily be in the way of compartmentalization of the shiner. Fortunately, the tree is young and vigorous enough to figure it all out.P90824+++
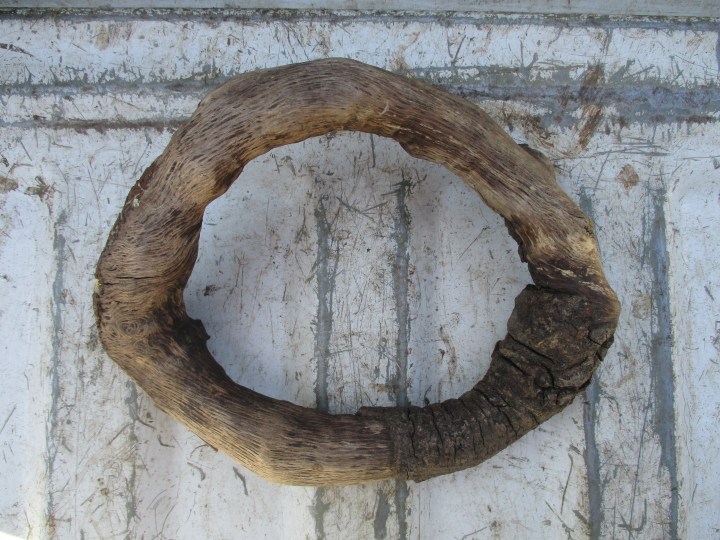
5. What looks like shark jaw bones without the teeth is the callus growth that once surrounded a well cut shiner. After the shiner was cut, and the tree started to compartmentalize over it, the tree died suddenly. As the trunk decayed, this dense callus growth that started to compartmentalize the shiner decayed slower. The uniformity of the callus growth shows how evenly the shiner was cut. I believe that the bottom of the shiner is to the left, but that could be backward. I can only say that the shiner is sideways in this picture.P90824++++
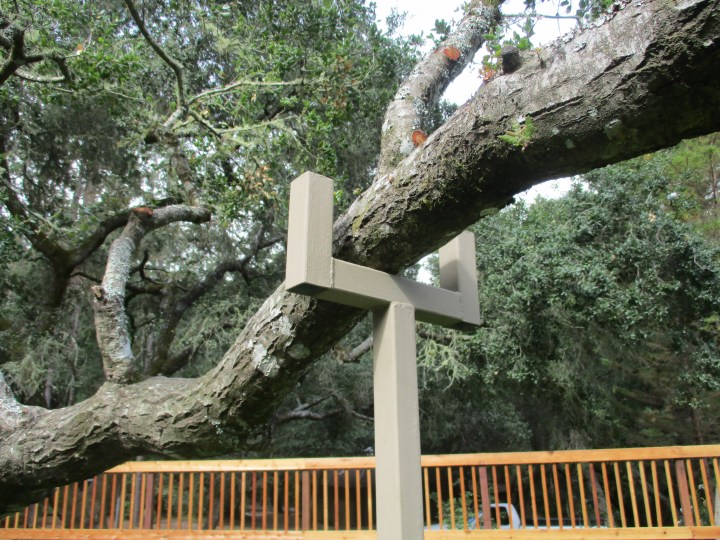
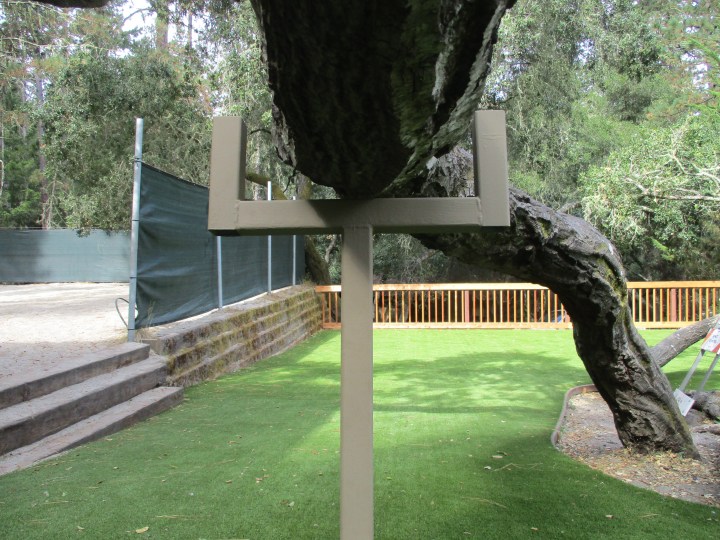
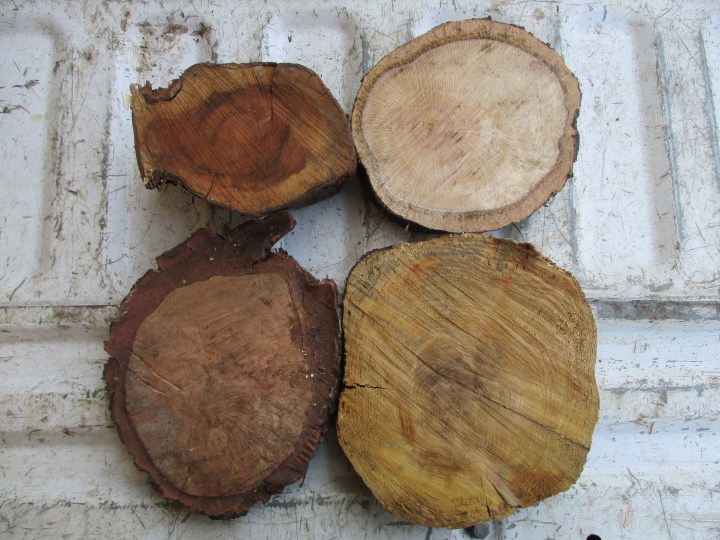
6. Coast live oak, Quercus agrifolia, is the only species in all five of the pictures above, and also provided the biscuits to the lower left and the upper right in this picture. ‘Biscuits’ are sometimes cut to adjust a shiner after the main part of a limb is pruned away, or perhaps to cut a stump slighter lower after a tree is cut down. I really do not remember why I saved the biscuit to the lower left, although I can remember the tree that it came from. The fresher one to the upper right is from the shiner in the first picture #1 above. I kept the Hollywood juniper biscuit to the upper left because I thought it would smell like the related Eastern red cedar (which is actually a juniper rather than a cedar) that cedar chests and closets are made with. The deteriorating biscuit to the lower right is from a very dead white fir that needed to be cut down. I kept it because I happen to be very fond of white firs, but so rarely see them here.P90824+++++
This is the link for Six on Saturday, for anyone else who would like to participate:

https://thepropagatorblog.wordpress.com/2017/09/18/six-on-saturday-a-participant-guide/

Horridculture – True Colors

P90821Bearded iris can bloom in almost any color. It is expected of them. There is not much they can do to surprise us.

Dahlias exhibit a remarkable range of both color and floral form. Only a few colors are beyond their range.

Roses, gladiolus, freesias, tulips, hyacinths, petunias, pansies, primroses and several of the most prolific bloomers are expected to provide many choices of color.

Other flowers are not so diverse. Forsythia blooms only in bright yellow, or perhaps a lighter hue of yellow. Mock orange blooms only in white, either single or double. Until recently, before purple was invented, the common species of lily-of-the-Nile were either blue or white. We tend to appreciate such flowers for their simplicity, and do not expect anything more from them.

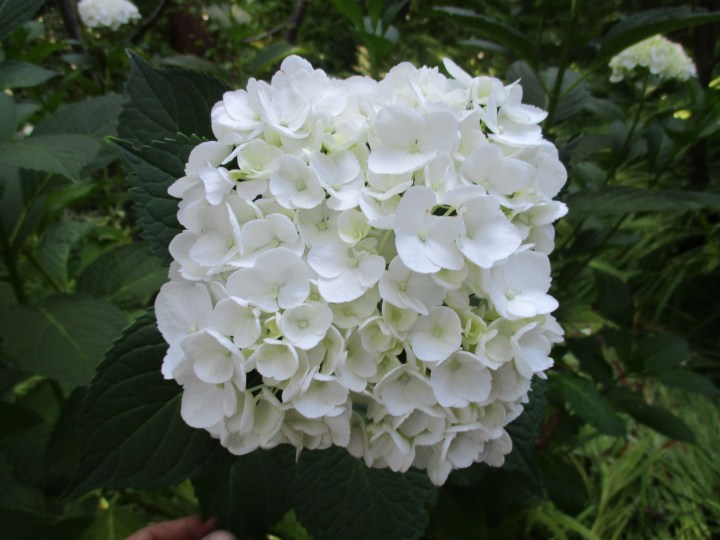
Decades ago, hydrangeas were either white or pink or blue. I say ‘either’ because what seems to be three choices is actually only two. White hydrangeas were always white. Pink or blue hydrangeas were the same, but were pink in alkaline soil, or blue in acidic soil. Blue hydrangeas planted into alkaline soil turned pink. Conversely, pink hydrangeas turned blue in acidic soil.

In the slightly alkaline soil of the Santa Clara Valley, pink hydrangeas were common. Blue hydrangeas were fertilized regularly with aluminum sulfate or some sort of acidifying fertilizer.

In the more acidic soil of the West Coast of Washington, pink hydrangeas would have been blue without lime.

Some more recently bred cultivars of hydrangea excel at either pink or blue. It does not take much to convince them to exhibit their preferred color in less than conducive conditions. These cultivars made it easier to grow blue hydrangeas in the Santa Clara Valley, or pink hydrangeas on the West Coast of Washington.

Then breeding got ridiculous. Hydrangeas were bred to bloom reliably in rich shades of purple, red, or dark blue, with minimal sensitivity to the pH of the soil. They are appealing to those who like these unnaturally rich colors; but to those of us who expect hydrangeas to bloom in white or traditionally soft hues of pink or blue, they are just too weird.

Can’t See The Tree For The Forest

P90818Big trees get big problems. Part of our job is to tend to these problems before they become dangerous. Many of these problems are somewhat easy to identify. A deteriorating ponderosa pine with browning foliage it difficult to ignore if it is tall enough to be seen above the rest of the forest more than a mile away.

There are a few problems that are not so easy to identify. Some are caused by the weather, without prior warning. Others are hidden in the forests. One might think that those in the forests would not concern us. However, our landscape and facilities are so intricately mixed with the forests.

The shiner in the picture above was where a big broken limb needed to be cut from a big fir tree. It may not look big in the picture, but the limb was probably more than nine inches wide, and long enough to weigh a few hundred pounds. The lower right edge of the shiner is frayed because the limb broke right at the trunk, and was hanging vertically against the trunk.

The yellow arrow in the picture below indicates where the shiner is located. The trunk of the tree is not as tapered as it seems to be in the picture. It only looks like this because it is so tall that the the upper portion is very far from the camera! Although this fir is a wild forest tree, it is only a few feet from the cabin below. The broken limb was dangling directly over the roof!

There was no way to predict that this limb would break. It did not seem to be any more structurally deficient than those that remain. Of course, once broken, it was removed faster than I could get a picture of it.P90818+

Fasciated Lily-of-the-Nile

P90817K

Floral fasciation is a rare developmental disfigurement of a bloom, supposedly caused by the fusion of two or more blooms. Many fasciated blooms really do look like two blooms stuck together, like double daisies. Alternatively, fasciation can cause distention of a single flower of many on a foral spike of foxglove.

Fasciation of lily-of-the-Nile bloom is typically expressed merely as a few stray florets on the otherwise bare stalk below the main floral truss. A smaller subordinate stalk may seem to be fused to the main stalk below the stray florets.

The specimen in the picture above is exceptional. It really does look like a double bloom, with one stacked on top of the other. The atypically short and stout stem looks like a tightly fused bundle of several smaller stems. Those who do not know better might find the more billowy and more colorful fasciated bloom to be more appealing than the normal bloom pictured below.

The first picture of my ‘Six on Saturday‘ post this morning shows that this is not the only fasciated bloom here. There is another similar fasciated bloom right next to it. This suggests that the fasciation is likely caused by a genetic mutation that was shared with each of two rhizomes that split from the original.

If the mutation is sufficiently stable, and not likely to soon revert, more copies could be propagated later by division. The rhizomes split after bloom; so if one split into two last year, the two that are here now could split into four next year. If genetically stable, all four should bloom with the same fasciation next year.

To monitor their genetic stability, I should probably relocate these two odd rhizomes, to separate them from the others for observation. I suspect that they will eventually revert anyway.

P90817++

Six on Saturday: Out Of Africa


Lily-of-the-Nile was the first perennial that I divided and propagated on a substantial scale. Back when I was in the seventh grade, I was instructed to remove an overgrown specimen that was nearly a quarter of a century old. It was too tough, big and heavy to dig up intact, but relatively easy to dismantle and remove in smaller pieces. These smaller pieces were all too easy to split into individual rhizomes with single terminal shoots. These individual rhizomes were easily groomed and planted where I thought copies of the same lily-of-the-Nile would be nice. A few years later, these copies were big enough to be dug and divided into even more copies. Nearly four decades later, I am still growing a few copies.

Because it is so resilient and undemanding, lily-of-the-Nile is one of the most common perennials here. They bloom through summer, with their firework shaped blooms at their best in time or the Fourth of July. Now that they are finishing their long bloom season, the deteriorating flowers must be removed, by ‘deadheading’.

1. Lily-of-the-Nile, although common, really is a delightful perennial. I thought I was getting a good representative picture here, but can now see that the two lower blooms in the foreground are fasciated, so are more billowy than typical blooms are. Also, the sunlight at about noon was a bit too harsh for a good picture of the foliage.P90817

2. This very late blooming floral truss is how all the other blooms started out.P90817+

3. This one shows how they look at full bloom. It is only beginning to deteriorate.P90817++

4. As individual florets fall away, these maturing green seed capsuled remain. They slowly dry and turn tan before tossing their seed late in autumn or winter. Of course, they should get pruned out before they do so.P90817+++

5. Lily-of-the-Nile are very easy to work with, but snotty with this goo that flows from all cut floral stems and any damaged leaves. Ick!P90817++++

6. This is the pile of deadheaded bloom that got cut on Wednesday. More will be cut next Wednesday. Almost all typically finish within two weeks or so. However, they started a bit late this year, and are finishing more randomly than they normally do.P90817+++++

This is the link for Six on Saturday, for anyone else who would like to participate:

https://thepropagatorblog.wordpress.com/2017/09/18/six-on-saturday-a-participant-guide/

Horridculture – Stumpy

P90814Among pines, firs, redwoods and most excurrent trees (with central leader trunks), stubs or stumps of limbs that were shed are common and more apparent than they are among decurrent trees (which branch into many main limbs). The older lower stubs slowly but eventually decay and fall away as the trunks compartmentalize (heal over) where they were formerly attached.

However, wild trees are rarely completely without such stubs. As the older lower stubs are shed, newer stubs develop higher up. The worst of their stubs get pruned away only when more refined landscapes are developed around such trees, and they get pruned accordingly. If the trees get groomed regularly every few years or so, not many new stubs get a chance to develop.

When pruning out viable limbs, they must be cut cleanly from the trunk or supporting limb, without stubs. Since they do not deteriorate slowly before falling away, the trunk or supporting limb has no time to start the process of compartmentalizing (healing) over where such limbs were attached. Cutting away cleanly eliminates as much obstruction to that process as possible.

Pruning necrotic stubs from trunks of excurrent trees is not quite so important because the trunks have a tendency to start the process of compartmentalization as such stubs are decaying, and can actually constrict and crush stubs if they do not fall away efficiently enough. Nonetheless, necrotic stubs get pruned out when trees are groomed, just because they are unappealing.

So, no matter what, stubs should not be left when pruning. It is not complicated. It is actually easier to control a saw when it is up against a tree trunk or main limb. Yet, many who do not know better, and many who really should, more often than not, leave trees looking like this fir tree.

No Cherry On Top

P90811Weeping flowering cherry is another type of tree that almost never gets appreciated like it should. Like so many Japanese maples, they get planted into situation where so-called ‘gardeners’ shear them into nondescript globs of worthless foliage that only get in the way. Some get shorn so regularly that they are deprived of bloom. Their form and bloom are their two main assets.

The climate here is not easy on them either. Although comfortably mild, the climate is also arid. This aridity enhances the potential for sun scald of exposed bark. Because upper limbs bend over to hang back downward, their bark is more exposed than that of upright flowering cherries. Consequently, upper limbs are often scalded and ruined, disfiguring the remaining canopy.

Pruning can be complicated. Removal of scalded upper growth exposes inner growth that is more sensitive to scald. It is sometimes necessary to leave damaged upper growth until it gets replaced from below by newer growth. Regular pruning to remove as much of the superfluous lower growth as possible should stimulate more vigorous growth among the stems that remain.

This is really the best technique for preventing scald among upper growth. It may sound silly, but pruning from below to concentrate growth into fewer stems that extend from or through the top of the canopy keeps the top of the canopy healthy and resilient to scald. It also elevates the pendulous canopy that needs to be pruned very regularly for vertical clearance anyway.

It is not easy to see in this picture, but this small weeping cherry tree is developing two distinct canopies. The original upper canopy was damaged by scald and is now disfigured. It is mostly to the upper left of center of the picture. A more symmetrical inner canopy that is developing where superfluous inner growth was pruned out last winter is evident below and to the right.

If there were not a walkway so close to the tree, and I were not concerned with maintaining vertical clearance, I could prune the upper canopy back over a few years, and subordinate it to the healthier lower canopy as it grows through it. Instead, I will prune out most of the inner canopy, leaving only a few vigorous stems that can replace what is missing in the upper canopy.

There is no need to be concerned with it now. The lower stems are not too obtrusive yet. They can bloom next spring, and get pruned out next summer before they really do get obtrusive.

The Grass Is Not Always Greener

P90810KThe lawn around the three small but gnarly oaks that were featured this morning in ‘Six on Saturday: Do Not Sit On Tree‘ was not always so perfectly green and uniform. Only a few months ago, it was real grass. Well, it was ‘sort of’ real grass. It was mostly dusty sand with some grass growing it in. There were weeds too, but even they were not very happy to be there.

Maintenance was ridiculous. Because some of the grass was actually alive, it needed to be mown regularly, which sometimes rutted damp soil, but more often blew dust from dry soil into the surrounding buildings. Because the soil retained such minimal moisture, the lawn needed to be irrigated regularly; but because of the old oaks trees, it could not be irrigated too generously.

The only reason that the lawn was there at all was because it got so much use. No one seemed to mind that it was such a dusty mess. The lawn dutifully served its purpose for half a century. Nonetheless, a better lawn was needed.

New sod would have been excellent, but would eventually succumb to the same wear and tear that was so brutal for the original lawn. There was also concern that the irrigation needed to sustain a turf lawn, particularly a new turf lawn, would eventually distress the aging oaks within. Ultimately, artificial turf was selected as an alternative to the real turf of the original lawn.

Rather than sow artificial seed for the artificial turf, artificial sod was installed, just like carpeting. It was remarkably quick and easy, and no one seems to mind that it is . . . well, artificial.

Because the old oaks are accustomed to the regularly scheduled irrigation of the original lawn, they will get watered by hose for the next few years, until they adapt to the lack of irrigation. (Of course, they will not get irrigated nearly as regularly as the original lawn was, but might get occasional deep irrigation just a few times through summer for only the next few summers.)

As resilient and undemanding as artificial turf is, it is not perfect. Almost immediately after installation, two melted spots appeared where guest had barbecued in portable grill. We do not know what happened to cause the damage, but we do know that the lawn will not repair itself.